


Understanding the 10-inch Digital Photo Frame: Features & Benefits
What Makes a 10-inch Digital Photo Frame Special?
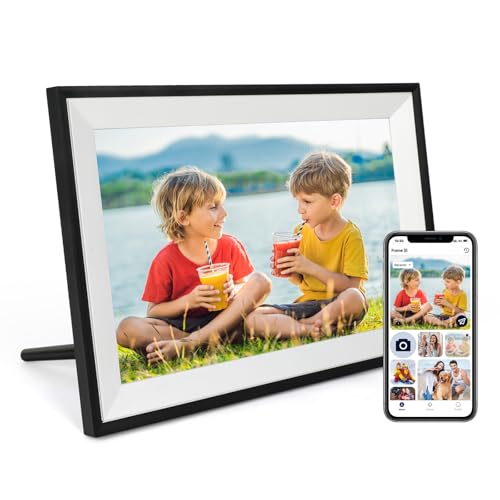
A 10-inch digital photo frame strikes the perfect balance between compactness and visibility. It is large enough to display your cherished memories vividly, yet small enough to fit comfortably on most surfaces. With this size, we can effortlessly bring our digital pictures to life in living rooms, offices, or even kitchen counters, providing a delightful way to enjoy our photographs without the need to print them.
Key Features to Consider
When looking at a 10-inch digital photo frame, we should focus on a few key features. Firstly, look for a frame that offers good resolution; ideally, a minimum of 800 x 600 pixels ensures that your photos appear clear and vibrant. Plus, many frames come with additional functionalities like video playback, which allows us to relive experiences not captured in still images. Wi-Fi connectivity is also a fantastic feature, allowing us to upload photos directly from our phones or cloud storage without the need for constant USB connections. Lastly, an intuitive remote control or touchscreen interface can make browsing and setting up the frame a breeze.
Choosing the Right Display Quality for Your Photos
Understanding Display Resolution
Display resolution plays an essential role in how our photos look on a digital frame. A higher resolution means sharper, more detailed images. We recommend seeking a frame with at least 1024 x 768 pixels for optimal clarity, especially if we have images that are rich in detail. Additionally, the aspect ratio is important too; a 4:3 ratio is standard for many photos, ensuring that pictures don’t appear stretched or cut-off.
Brightness and Viewing Angles Matter
It’s vital for us to consider both brightness and viewing angles. An adjustable brightness setting can help us adapt the display to various lighting conditions, from bright sunshine to a soft evening glow. Furthermore, the viewing angle lets us view images clearly from different sides of the room, which is especially beneficial during gatherings.
Exploring Storage Options: Internal vs. External
Understanding Internal Storage
Many 10-inch digital photo frames come equipped with internal storage, which is crucial for those of us who prefer simplicity. This means we can upload photos directly to the device without needing any external devices. Typically, frames may hold anywhere from a few hundred to thousands of photos, depending on the available internal memory. For many users, the internal memory is sufficient, making it an excellent choice for hassle-free viewing.
The Benefits of External Storage
However, some of us may wish to expand this storage, and that’s where external options step in. Many frames support USB drives and SD cards, allowing us to keep a larger library of images. This option is great for those who frequently update their photo collections or prefer to showcase themed albums, such as holidays or family events. By using external sources, we also maintain flexibility in managing stored images without the limitations of internal memory.
Setting Up Your Digital Frame: A Step-by-Step Guide
Unboxing and Initial Setup
Setting up our digital photo frame is usually straightforward. Upon unboxing, we begin by placing the frame in an ideal location that is both visible and convenient. The power cable will need to be connected, and in many cases, we should insert the included batteries, if applicable, for remote control functionality. Once powered on, the initial setup process typically involves selecting the language and connecting to Wi-Fi if the frame has smart features.
Uploading Photos and Customising Settings
Once our frame is ready, we can begin uploading photos. If our frame allows direct uploads via Wi-Fi or an app, we simply follow the prompts to connect our devices. Alternatively, if we’re using a USB or SD card, inserting it will usually prompt the frame to start importing images automatically. After uploading, we can navigate through settings to adjust playback speed, transition effects, and slideshow intervals, allowing us to tailor the presentation style to our liking.
Customising Your Photo Frame: Personal Touches and Settings
Adding Personalised Touches
Many digital photo frames allow us to add a personal touch through custom settings. We can select specific playlists, choosing which photos to show based on themes or events. Also, some models let us create fun collages or arrange images in exciting patterns, giving our display a unique flair. Customisation not only enhances our viewing experience but makes the frame feel more personal.
Exploring Additional Settings for Optimal Use
To fully embrace the functionality of our digital photo frame, we can dive into additional settings. Features such as sleep timers can help conserve energy, automatically turning off the display during the night. Furthermore, we can choose how often we want our images to change, creating dynamic presentations that keep our displayed memories fresh and exciting. Adjusting these settings ensures that our frame operates efficiently while maximising enjoyment.