


Understanding the Basics of Irrigation Controllers with 2 Outputs
What is an Irrigation Controller?
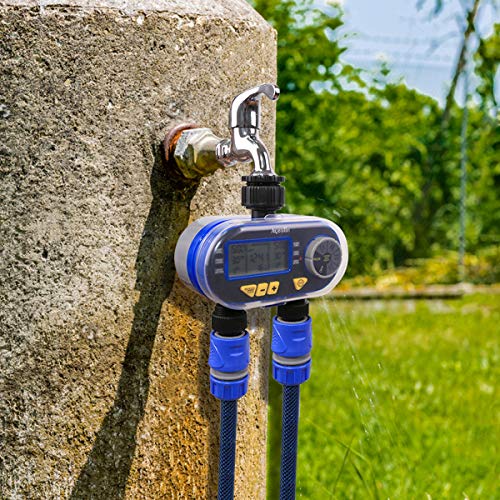
Irrigation controllers are essential devices for anyone looking to take the hassle out of watering their garden or lawn. These smart devices automatically manage when and how much water is applied to your plants, based on specific schedules or environmental factors. When we refer to irrigation controllers with 2 outputs, we mean that these controllers can operate two separate watering zones independently. This is particularly advantageous if you have a garden that requires different watering needs for various plant types or areas.
How Do They Work?
Irrigation controllers work by sending signals to valves that control the water flow to your garden. You typically set the schedule directly on the controller, which then activates the water supply at pre-determined times, for set durations. For instance, if you have flower beds and a vegetable patch, you can customise settings for each zone, ensuring that each area receives the right amount of water without overdoing it.
Key Features to Look for in an Irrigation Controller
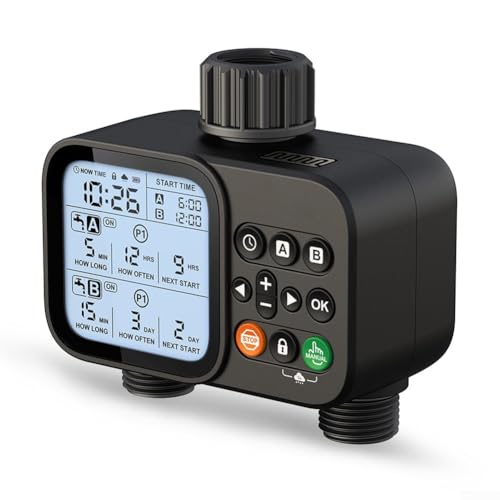
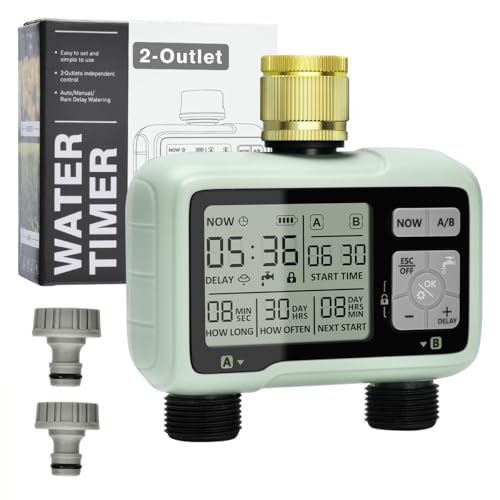
Programmability and Scheduling Options
When selecting an irrigation controller, we should prioritise programmability. Look for a model that allows easy scheduling. Features like multiple start times and various run durations can significantly enhance your watering efficiency. For example, you might configure your vegetable patch to receive water early in the morning while allowing your flower beds to be watered later in the day.
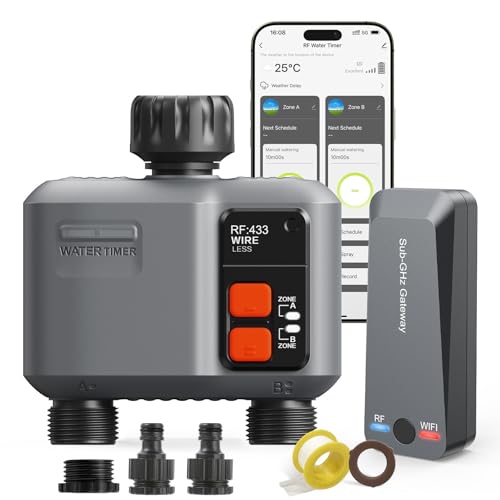
Weather Sensors and Smart Technology
Smart technology is becoming increasingly important in irrigation controllers. Some models come equipped with weather sensors that measure rainfall and humidity, adjusting your watering schedule automatically. This means you can save water and ensure you’re not overwatering your plants, which is particularly useful in times of unpredictable weather.
Ease of Use and Installation
We understand that not everyone has a background in gardening equipment. Therefore, ease of use is a vital feature. Opt for a control panel that is intuitive, maybe even featuring a digital display that guides you through the programming process. Additionally, a straightforward installation process allows you to set up your irrigation system quickly and hassle-free.
How to Choose the Right Irrigation Controller for Your Garden
Assess Your Garden’s Layout and Needs
Before making a purchase, we recommend assessing your garden’s layout and specific watering needs. Take note of the types of plants and their respective water requirements. If you have distinct areas that thrive under different conditions, then a controller with two outputs is likely the right choice. For example, flower beds may thrive with more frequent, lighter watering compared to drought-resistant shrubs.
Consider Your Budget
Set a budget before you start looking at options. Irrigation controllers can vary significantly in price based on features. While it might be tempting to opt for the cheapest option, investing a bit more in a model with better technology or ease of use can pay off in terms of water savings and plant health.
Top Recommendations for Irrigation Controllers with 2 Outputs
Product A: User-Friendly Interface
One of our top picks is Product A, which features a user-friendly interface and offers multiple programming options. It’s perfect for beginners and seasoned gardeners alike, ensuring that both your flower beds and vegetable patch receive tailored care.
Product B: Advanced Smart Features
If you’re looking for advanced features, we recommend Product B, which integrates smart technology. With built-in weather sensors, it adjusts your watering schedule based on real-time weather conditions, providing convenience and conserving water.
Installing and Setting Up Your Irrigation Controller
Step-by-Step Installation Guide
Installing your irrigation controller should be seen as an exciting project rather than a daunting task. Start by locating the irrigation valves for the two zones you want to control. Follow the manufacturer’s instructions provided in the packaging to connect the corresponding wires from the controller to these valves. Don’t forget to position your controller in a sheltered area, protected from the elements.
Configuring the Controller
Once installed, we recommend taking your time to configure the controller. Begin by setting the current time and day, followed by programming the two zones according to the plants’ specific needs. Many controllers have a simple step-by-step guide appearing on the screen. Always run a quick test to ensure everything is working properly before walking away.


