


Understanding Soil Testers: What They Are and How They Work
Introduction to Soil Testers
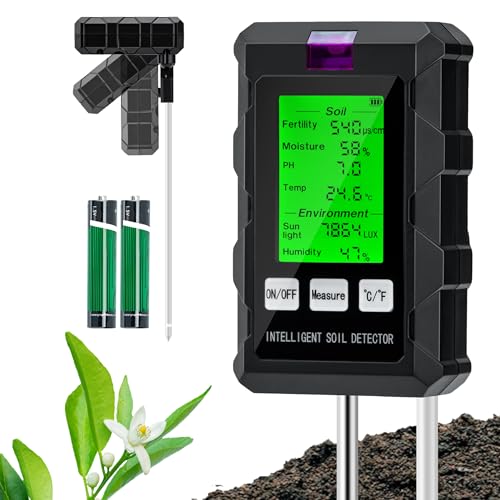
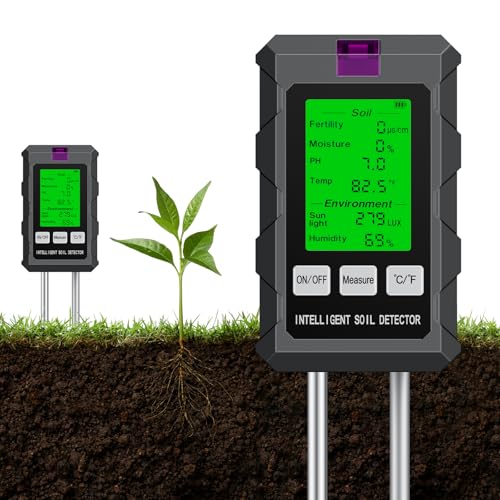
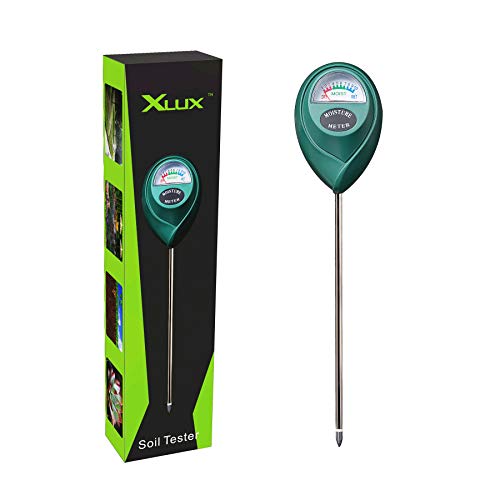
Soil testers are handy tools that help us understand the condition of our garden soil. They provide valuable insights into the soil’s pH level, nutrient content, and moisture levels. By measuring these factors, soil testers allow us to assess whether our garden soil has the right balance to support healthy plant growth. Typically, these devices come in both handheld and electronic versions, making them accessible for everyone from casual gardeners to serious horticulturists.
How Soil Testers Operate
Most soil testers work by inserting a probe into the soil and obtaining readings that inform us about its quality. For example, digital testers will display the readings on a small screen, while some manual testers use colour-coded charts to help us interpret our results. By using electrodes to measure electrical resistance, soil testers can accurately gauge nutrient levels and pH, giving us a clearer picture of what our soil needs to thrive.
Choosing the Right Soil Tester for Your Garden: Key Features to Consider
Understanding Your Gardening Needs
Before purchasing a soil tester, it’s essential to consider what you need it for. If you’re a hobby gardener growing vegetables or flowers, you might opt for a simple pH meter. On the other hand, if you’re handling a larger landscape or aiming for more precision, look for a comprehensive soil testing kit that measures pH, moisture, nitrogen, phosphorus, and potassium.
Key Features to Look Out For
When selecting a soil tester, consider its ease of use, accuracy, and the types of measurements it offers. A good soil tester should provide quick and reliable results, be easy to read, and include an instruction manual to assist you. Additionally, portability is vital; a lightweight and compact model can be carried around easily in your garden. Some testers even have digital displays for clearer readings, making them user-friendly for everyone.
Using Your Soil Tester: Step-by-Step Guide for Accurate Results
Preparing the Soil Sample
The first step in using your soil tester is to prepare your soil sample. Choose a representative spot in your garden, ensuring it reflects the general soil conditions. Remove any surface debris like leaves or stones, then dig down about six inches to collect your sample. Break up any clumps to ensure the soil is fine and well-mixed.
Testing with Your Soil Tester
Once you’ve prepared your sample, follow the specific instructions provided with your soil tester. Generally, you’ll insert the probe or mix the soil with a test solution, as directed. For a digital tester, wait for the reading to stabilise and then record the numbers. For colour-coded testers, compare the resulting colour with the chart to determine the pH and nutrient levels. Each reading will help us understand what’s lacking or what might be excessive in our soil.
Interpreting Your Soil Test Results: Simple Ways to Improve Soil Quality
Understanding What the Numbers Mean
Once you’ve gathered your soil test results, the next step is to interpret what they mean. Typically, pH levels should be between 6.0 and 7.0 for most plants; if your results fall outside this range, adjustments will be necessary. Nutrient levels are often marked with indicators like low, adequate, or high, guiding us on whether to fertilise or amend the soil.
Improving Soil Quality
If your test shows deficiencies, don’t panic! Simple solutions exist. For low pH, we can add lime to increase alkalinity, while a boost in acidity can be achieved with sulphur. If nutrients like nitrogen are lacking, a good quality fertiliser or compost can be incorporated to enhance soil health. Always aim for balance; too much of a good thing can be just as detrimental as too little.
Maintaining Your Soil Tester: Tips for Longevity and Performance
Keeping Your Soil Tester in Shape
To ensure your soil tester serves you well for many gardening seasons, it’s vital to maintain it properly. Start by storing it in a cool, dry place after every use to protect it from moisture and extreme temperatures. Regular cleaning is also essential; wipe the probe or any testing components with a soft cloth to prevent residues from interfering with future tests.
Checking for Accuracy
Periodically check your soil tester for accuracy. Some digital testers may require recalibration, which will be outlined in the user manual. For manual models, re-test soil at the same location after a few weeks to ensure consistent results. If discrepancies arise, it may be time to consider replacing your tester or revisiting the calibration process.