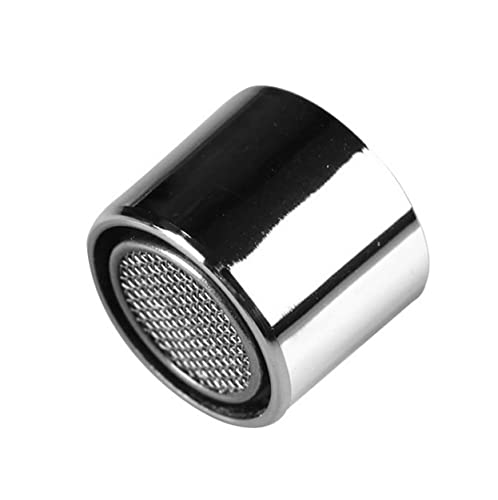

Understanding Tap Aerators: What They Are and How They Work
What is a Tap Aerator?
A tap aerator is a simple device that fits onto the end of a tap, helping to mix air with the water flow. This mixture creates a steady stream of water without wasting it. You might have noticed that some taps seem to provide a soft yet strong flow of water, which is likely due to an aerator. When water passes through this device, it gets mixed with air, reducing the amount of water that comes out, while still providing the feel of a powerful flow.
How Do Tap Aerators Function?
When water exits the tap through the aerator, it does so in a controlled manner. The aerator works by forcing water through small holes that are strategically placed within its design. This constriction creates pressure that draws air into the mix, creating a foamy flow. Not only does this save water, but it also enhances the experience of washing your hands, filling pots, or cleaning dishes, as the water feels more substantial without the actual increase in volume.
Benefits of Installing a Tap Aerator: Enhancing Your Daily Water Use
Water Conservation
By installing a tap aerator, we can significantly reduce water usage without a noticeable difference in performance. For instance, if we normally use a tap that flows at 12 litres per minute, adding an aerator can cut that down to about 6 litres while maintaining the same flow feel. This reduction can lead to substantial savings on water bills over time, making it a smart choice for environmentally-conscious households.
Improved Water Pressure
Another benefit of these devices is that they can improve the perceived water pressure. The aerator allows water to flow more efficiently, so even if we lower the total volume, it feels just as powerful. This is particularly beneficial in sinks where we may need to rinse dishes quickly; the aerator ensures the water provides the same level of effectiveness.
Enhanced Comfort
Using a tap with an aerator feels comfortable, as the soft, aerated flow is gentler on our skin than the harsh flow of un-aerated water. This makes tasks like washing hands or face much more pleasant.
Cost-Effectiveness
From a financial perspective, tap aerators are a low-cost improvement. Their affordability combined with the potential savings on water costs makes them an attractive option for anyone looking to manage household expenses.
Choosing the Right Tap Aerator: Key Features to Look For
Flow Rate
When selecting a tap aerator, we should pay attention to the flow rate, which indicates how many litres of water it allows per minute. We can typically choose among various flow rates depending on our needs, but a standard aerator often ranges from 1.5 to 2.5 gallons per minute. If we want a good balance of efficiency and water pressure, a flow rate of around 2.0 gallons per minute is often ideal.
Type of Aerator
There are several types of aerators to consider. Fixed aerators ensure water flows at a constant rate, while adjustable aerators allow us to change the flow rate to suit our preferences. Some models even feature spray settings, offering versatility for different tasks like rinsing fruits or filling cooking pots.
Material and Durability
The materials used in aerators can affect their longevity. We should look for models made from durable materials, such as brass or chrome-plated components, which resist corrosion and wear. A quality aerator will last longer and perform reliably over time, so it’s worth investing in a well-built option.
Installation Made Easy: A Step-by-Step Guide to Fitting Your Tap Aerator
Gathering Your Tools
Before we begin the installation, we should gather the necessary tools, which typically include an adjustable wrench and possibly some plumber’s tape. Having these items ready will make the process smoother.
Removing the Existing Aerator
To start, we must first remove any existing aerator from the faucet. This is usually as simple as unscrewing it by turning it counterclockwise. If it’s stuck, using the adjustable wrench may help, but it’s essential to protect the tap’s finish by wrapping cloth around the aerator.
Fitting the New Aerator
Once the old aerator is off, we can screw on the new one by turning it clockwise. We should ensure it’s tightened, but be cautious not to overtighten, as this could damage the threads.
Testing for Leaks
Finally, we need to turn the tap on to check for leaks. Running water for a moment allows us to observe if any drips appear around the aerator connection, which would signal that we need to tighten it slightly more.
Maintaining Your Tap Aerator: Simple Tips for Long-Lasting Performance
Regular Cleaning
To ensure our tap aerator continues to function efficiently, regular cleaning is essential. We should check it every few months for any build-up of lime or mineral deposits, especially in areas with hard water. Cleaning can be as simple as soaking the aerator in vinegar for approximately 30 minutes, which helps dissolve any mineral deposits.
Inspecting for Wear and Tear
It’s also good practice to periodically check for any signs of damage, such as cracks or corrosion. If we notice any deterioration, replacing the aerator is a wise step to ensure continued reliable performance.
Keeping Spare Aerators on Hand
Since aerators are relatively inexpensive, having a spare on hand can be beneficial. This way, if we encounter performance issues or damage, we can quickly replace it without inconvenience.