


Understanding the Benefits of a Tool Organizer Wall: Clarity and Efficiency in Your Workspace
Enhancing Workspace Clarity
Imagine stepping into your workshop or garage and instantly knowing where every tool is located. This is one of the main benefits of a tool organizer wall. By visually displaying your tools, you eliminate the frustration of searching through cluttered drawers or piles. Each tool has its designated space, leading to greater clarity and efficiency.
Boosting Productivity
With tools readily accessible and visible, you reduce the time spent looking for what you need. Think about how much time we can waste digging through a toolbox when a simple glance at an organized wall can tell us exactly where to find a wrench or screwdriver. This can make a significant difference, especially during important projects where every minute counts.
Creating a Neater Environment
An organized environment is not just aesthetically pleasing; it positively affects our mindset and productivity. Having a tool organizer wall contributes to a tidy workspace, inspiring you to work more efficiently. It also makes clean-up easier after finishing your tasks, as putting tools back in their designated spots becomes second nature.
Key Features to Consider When Selecting a Tool Organizer Wall
Material Durability
When choosing a tool organizer wall, the material is crucial for longevity. Opt for walls made from sturdy materials like steel or high-grade plastic that can withstand the weight of your tools without bending or breaking. Consider materials that are not only durable but also resistant to rust and corrosion, especially if your workspace is prone to moisture.
Customization Options
Look for tool organizer walls that offer various customization options to suit your unique collection of tools. Different types of hooks, shelves, and compartments should be available to help you design an arrangement that works best for you. A versatile system allows you to adapt as your tool collection grows or changes.
Size and Capacity
Ensure that the tool organizer wall you select fits your available space while providing enough capacity for all your tools. Measure your wall accurately and consider how many tools you intend to hang or store. A wall that’s too small will cause overcrowding, while one that’s overly large may take up more valuable space than necessary.
Types of Tool Organizer Walls: Finding the Perfect Match for Your Needs
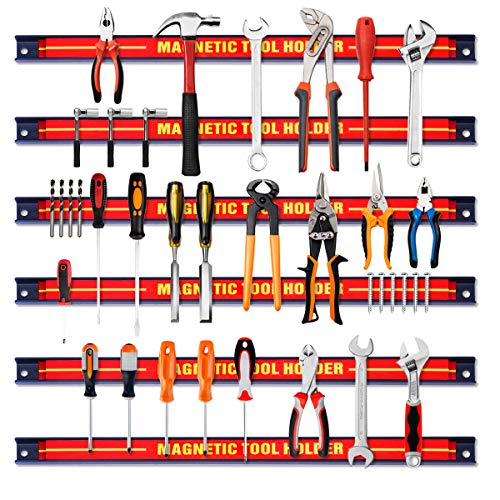
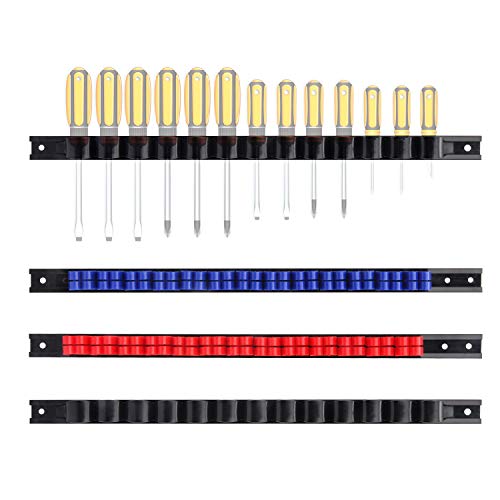
Magnetic Tool Organizer Walls
A magnetic wall is an excellent choice for those who prefer easy access and swift organization. Magnets allow metallic tools to cling directly to the wall, keeping them visible and reachable at all times. This type works particularly well for small hand tools and is ideal if you frequently need to grab items on the go.
Pegboard Tool Organizer Walls
Pegboard panels are incredibly popular for tool organization, offering flexibility in tool arrangement. You can easily reposition hooks or add additional features as needed. If you like to frequently change your layout or add new tools to your collection, pegboards create a dynamic and adaptable system in your workspace.
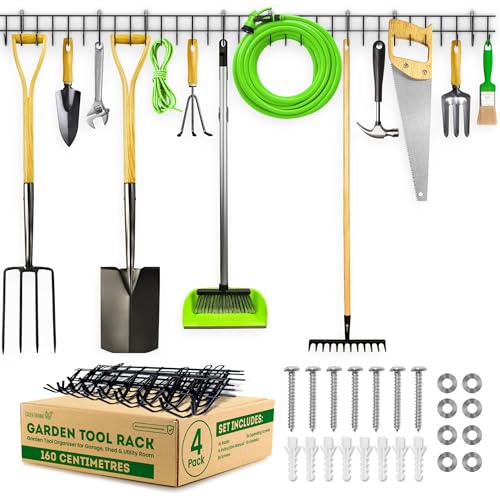
Shelving and Cabinet Solutions
For larger tools or a more hidden approach to organization, consider wall-mounted shelves or cabinets. These solutions provide additional surfaces for holding power tools or materials while keeping the space looking tidy. They can be combined with other organizers, providing an all-encompassing storage system for your workshop.
Installation Tips for a Hassle-Free Setup: Maximising Space and Accessibility
Plan Your Layout
Before mounting your tool organizer wall, take a moment to plan its layout. Visualize the tools you will use most often and place these in the most accessible spots, while storing less frequently used items higher or out of immediate reach. A well-thought-out layout maximizes usability and helps you maintain an organised space.
Use the Right Tools for Installation
Having the correct tools for installation can save us a lot of trouble down the line. Ensure you have a reliable drill, level, and measuring tape handy. If your wall organizer requires anchors, make sure to purchase the appropriate type based on your wall material, whether it’s drywall, plaster, or masonry.
Consider Safety When Installing
Safety should always be a priority during installation. If your tool organizer wall is heavy or if you’re unsure about securing it, consider asking for help. Anchoring the wall securely is vital to prevent accidents or tool spills, which can lead to injury or damage to your workspace.
Maintaining Your Tool Organizer Wall: Best Practices for Longevity and Performance
Routine Cleaning
Maintaining a tool organizer wall doesn’t just mean tidying up tools; it also involves routine cleaning. Periodically wipe down the surface to prevent dust and grime build-up that can hinder visibility and accessibility. Use a mild cleaner suitable for your wall material to keep it looking fresh and functioning well.
Regularly Check for Wear and Tear
Keep an eye on your hooks and shelves for any signs of wear or looseness. Regular checks can catch issues before they escalate, ensuring that your tools remain securely stored. If you notice any parts that are not performing as they should, address them immediately to maintain a safe and organized environment.
Adjust as Needed
As your collection of tools evolves, so too may your organization needs. Be prepared to make adjustments to your tool organizer wall layout to accommodate new tools or accessories. This not only keeps your workspace efficient but also ensures that your organization system remains as effective as possible.