
Understanding Banneton: What It Is and Why We Use It
What is a Banneton?
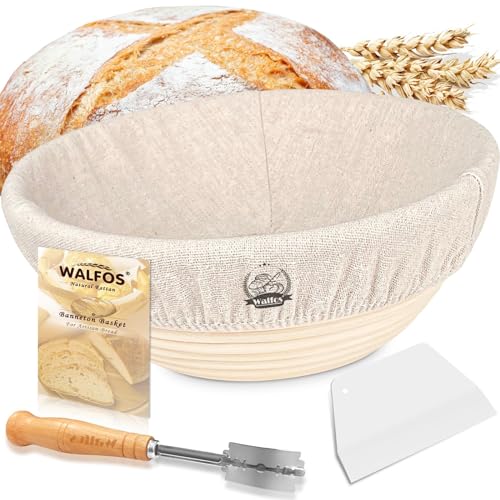
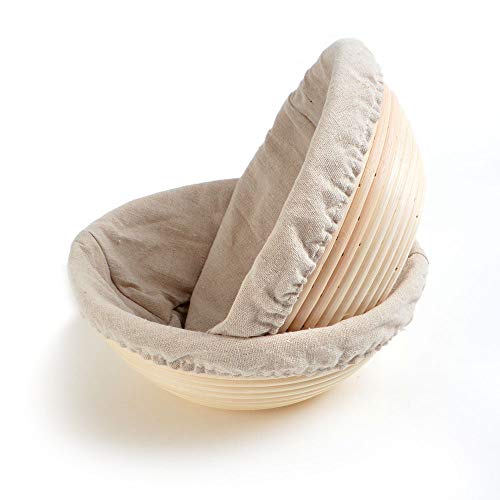
A banneton is a type of basket used primarily for proving (or resting) dough before baking. It comes in various shapes, but the most common ones are round and oval. The baskets are typically made from natural materials like cane or rattan, designed to absorb moisture from the dough’s surface, providing optimal conditions for the bread to rise. This unique function creates a better crust, often resulting in a lighter, crustier loaf.
Why Use a Banneton?
Using a banneton is essential for achieving a well-shaped loaf of bread. The structure and design of these baskets help maintain the dough’s shape during the rising process, which can be especially important for more delicate bread types, like sourdough. Additionally, the patterned interiors often leave a beautiful imprint on the dough, which enhances the overall appearance of your finished bread, making it not only taste good but look impressive as well.
Key Features to Look for in a Banneton: Size, Material, and Design
Choosing the Right Size
Bannetons come in various sizes, and selecting the right one is crucial for your baking needs. If you typically bake larger loaves, opt for a bigger banneton, while smaller versions are ideal for smaller loaves or individual rolls. A standard round banneton is usually about 22cm in diameter and can accommodate a 500g to 750g dough. Consider the amount of dough you usually make to determine the best size.
The Right Material
Material significantly impacts the performance of your banneton. Cane and rattan are the traditional materials used, as they are lightweight, breathable, and excellent at moisture absorption. This helps prevent the dough from sticking and promotes the formation of a crust. Some modern options include plastic lined with linen, which can be easier to clean but may not provide the same climbing experience. If your priority is a rustic loaf with the desired crust, stick with natural materials.
Design Features to Consider
Look for bannetons with a nicely woven design that allows air circulation. The pattern can also affect the imprint on your loaf, providing character to your final product. Additionally, having a fabric liner can be beneficial, as it can also be removable for easy washing. Ensure the banneton is sturdy and provides the necessary support during proving; this will make a noticeable difference in the final loaf’s structure.
How to Choose the Right Banneton for Your Baking Needs
Assess Your Baking Style
Before choosing a banneton, consider how often you bake and the types of bread you enjoy making. If you bake frequently, investing in a high-quality banneton may enhance your bread-making experience. For those who bake occasionally, a mid-range option might suffice. Think about the shapes you prefer; if you like artisan-style loaves, a round or oval shape would be best, while a longer banneton is ideal for baguettes.
Consider Your Dough Types
Different dough varieties require different banneton shapes and sizes. For high-hydration doughs that are sticky, a well-floured banneton will hold the dough nicely, while denser doughs might require a sturdier design. Understanding the specific needs of your recipes will help guide your choice. Additionally, if you frequently experiment with varying recipes, having a few different sizes and shapes can be beneficial.
Caring for Your Banneton: Maintenance Tips for Longevity
Keep It Clean
Regular upkeep of your banneton is vital to ensure it lasts. After each use, gently tap out any excess flour, ideally outside, to prevent build-up. Avoid using soaps or detergents, as these can alter the natural properties of the material. Instead, ensure it is kept dry and allow fresh air to circulate, preventing any chance of mould developing.
Storing Your Banneton Properly
When not in use, it is important to store your banneton in a cool, dry place away from direct sunlight. This prevents cracking and avoids any unwanted exposure to moisture that could lead to mildew. Consider storing it in a breathable bag or container to keep it protected while allowing it to remain moisture-free.
Using a Banneton: Step-by-Step Guide to Perfecting Your Bread
Preparing the Banneton
Before you start, generously dust the inside of your banneton with flour to prevent sticking. Rice flour or a mix of flour can work exceptionally well since it absorbs moisture better than regular flour, ensuring a smooth release of your dough.
Shaping Your Dough
Once your dough has risen, turn it out onto a lightly floured surface. Gently shape it into a round or oval, depending on your banneton shape. Avoid excessive handling, as you want to maintain the air pockets that help with the final rise.
Final Proofing
Place your shaped dough seam-side up into the prepared banneton. Cover it with a cloth to prevent it from drying out while it receives its final rise. The time required will depend on your specific recipe, but generally, around 30-60 minutes should be adequate.
Baking Your Bread
When ready to bake, carefully flip the banneton onto your preheated baking surface. The dough should come out easily if you dusted it appropriately. Bake according to your recipe, and enjoy the fragrant aroma and delicious results as your bread turns golden and crusty!