


What is a Belt and Disc Sander and How Does It Work?
Understanding the Basics of Belt and Disc Sanders
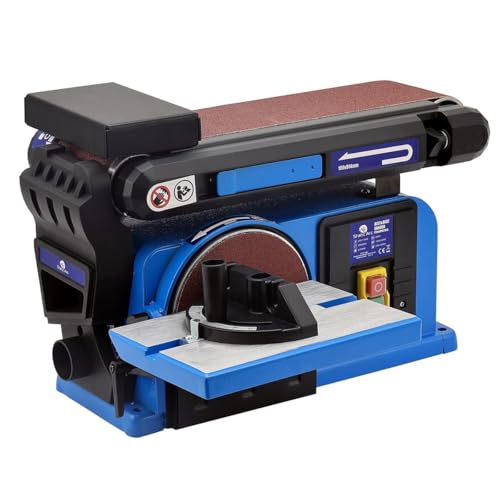
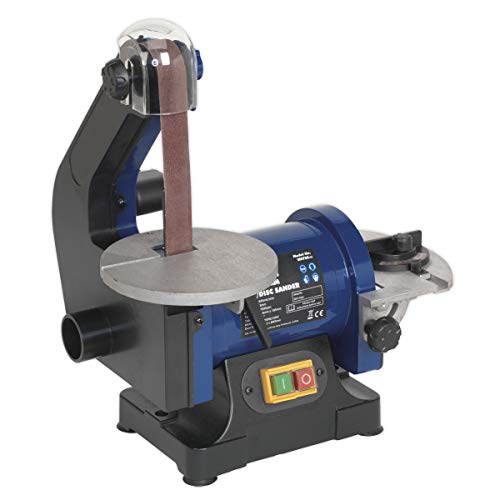
A belt and disc sander is a versatile tool designed for smoothing and shaping materials such as wood and metal. It comprises two main components: a sanding belt that runs over pulleys and a disc sander that features a circular sandpaper surface. The belt operates in a linear motion and is generally used for coarse sanding and shaping tasks, while the disc feature provides a flat surface that excels in finishing and detail work. Together, these functions allow for a variety of sanding tasks including removing rough edges, preparing surfaces for finishing, and achieving a smooth, even finish on intricate projects.
The Mechanism Behind Its Operation
How does it all come together? When we turn on the sander, the motor spins the belt and disc at high speeds. We press the material gently against these surfaces, allowing the abrasive sandpaper to remove unwanted material. The belt sander is perfect for larger flat surfaces or long pieces of lumber, while the disc sander is ideal for fine edge work and smaller items. The dual functionality of these machines makes them a popular choice in workshops, as they can tackle a variety of jobs efficiently.
Key Features to Look for in a Belt and Disc Sander
Motor Power and Speed
When selecting a belt and disc sander, we must consider the motor’s power, as this determines how effectively the tool will perform. Look for a sander with at least 1 horsepower for smooth and consistent operation, especially if you work with tough materials. Additionally, the speed at which the sanding surfaces rotate plays a significant role in efficiency and finish quality. A variable speed feature allows us to adjust according to the task at hand.
Sanding Surface Size
Another important feature to consider is the size of the sanding surfaces. A larger sanding belt (commonly around 4 inches wide) and disc (typically 8 inches in diameter) can handle big projects more effectively, while smaller sizes might be more suitable for detail work. Keep in mind the types of projects we will be undertaking; the right surface size can significantly reduce sanding time and effort.
Dust Collection System
A built-in dust collection system can make a huge difference in maintaining a clean workspace. While sanding generates a lot of dust, having a good dust collection mechanism helps to keep our area clean and improves visibility, which is important for precision work. Look for models that offer efficient dust collection options.
Choosing the Right Belt and Disc Sander for Your Projects
Assessing Your Needs
To choose the right belt and disc sander, we first need to evaluate the types of materials and projects we plan to work on. If most of our tasks involve heavier materials like hardwood or metal, opt for a more powerful model with robust components. However, for lighter projects or occasional use, a smaller, less powerful unit might suffice.
Portability vs. Stability
Consider where we will use the sander. If we plan to work in different locations, look for a portable option that is lightweight and easy to transport. On the other hand, if we have a dedicated workshop space, a heavier, more stable model will provide better performance and results.
Budget Considerations
Establishing a budget is crucial. Belt and disc sanders come at various price points, and while it might be tempting to go for the cheapest option, investing in a high-quality machine pays off in terms of durability and performance. It’s advisable to view it as a long-term investment that will enhance our woodworking or crafting experience.
Tips for Using Your Belt and Disc Sander Effectively
Setting Up for Success
Before we begin sanding, ensure the sander is set up correctly. This means properly aligning the belt and disc, checking the tension on the belt, and making sure the sanding surface is clean. A clean and well-aligned machine helps prevent wear and allows for better sanding outcomes.
Sanding Techniques to Master
To achieve the best results, it’s essential to understand our sanding technique. Always move the material against the direction of the rotation to ensure smoother finishes. Apply even pressure and keep the item moving to avoid gouging the surface. For intricate work, dedicate time to learn how to navigate smaller pieces effectively using the disc.
Safety First!
Safety should always be our top priority. Wearing safety goggles and a dust mask protects our eyes and lungs from dust particles. Always read the manufacturer’s instructions and operate the machine according to guidelines, including securing loose clothing and hair away from moving parts.
Maintenance and Care for Longevity of Your Sander
Regular Cleaning Regimen
To keep our belt and disc sander in peak condition, regular cleaning is crucial. After each use, we should clear away dust and debris from both sanding surfaces and the internals of the machine. Inspect the sandpaper regularly for wear and replace it as necessary to maintain optimal performance.
Periodic Maintenance Checks
Additional maintenance includes checking the belt tension, ensuring that all parts are securely fastened, and lubricating moving components when required. It’s beneficial to consult the user manual to understand specific maintenance intervals tailored to the model we own.
Storing Your Sander Properly
Storing our sander in a dry, clean space away from direct sunlight prolongs its life. Using a storage cover can further protect it from dust and debris when not in use. Proper care and storage ensure that our sander remains a reliable tool for many projects to come.


