


Understanding E-Bike Conversion Kits: Transforming Your Bicycle into an Electric Powerhouse
What Is an E-Bike Conversion Kit?
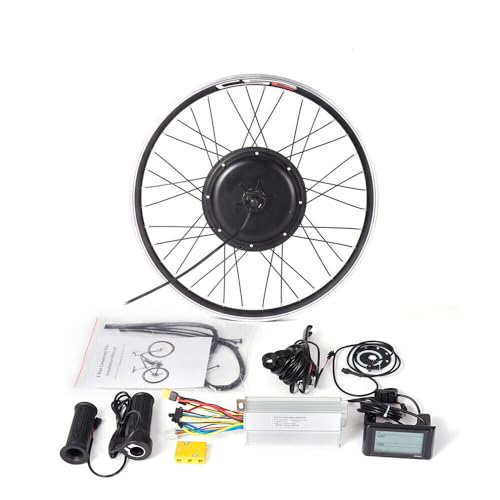
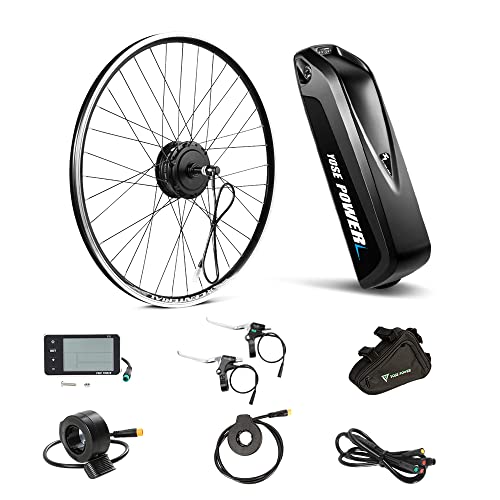
An E-Bike Conversion Kit is a set of components that allows you to convert your standard bicycle into an electric bike. This means you can keep your beloved bicycle while enjoying the added benefits of electric assistance when pedalling. Imagine riding up hills with ease or travelling longer distances without getting exhausted. The kit typically includes a motor, a battery, and a controller, transforming your cycling experience.
Why Consider Conversion?
Opting for an E-Bike Conversion Kit is a practical decision for many cyclists. It can save you money compared to buying a brand-new electric bike and allows you to personalise your ride in a way that suits your style. Think of it like upgrading your car with a turbo engine; you wouldn’t need to buy a new vehicle, but you’d gain all the speed and power. With an E-Bike Conversion Kit, you enhance your bicycle without the burden of additional costs.
Key Features to Look for in an E-Bike Conversion Kit
Motor Power and Types
When selecting a conversion kit, it’s essential to look at the motor’s power, generally measured in watts. A more powerful motor means better performance, especially on steep hills or during long rides. Motor types include hub motors, which are in the wheel, and mid-drive motors, which are located near the pedals. Hub motors are generally simpler to install and quieter, while mid-drive motors provide better weight distribution and handling.
Battery Capacity and Range
The battery is another crucial component, as it directly influences how far you can go on a single charge. Battery capacity is measured in amp-hours (Ah) or watt-hours (Wh). A higher capacity will give you a longer range. Imagine planning a day out cycling; with a 500Wh battery, you could comfortably cover 50 miles, while a 250Wh battery might limit you to around 25 miles. Choose a battery capacity that aligns with your riding habits.
Compatibility and Accessories
Compatibility with your existing bike frame and components is vital. Ensure that the kit can fit well with your bicycle’s specifications. Additionally, consider kits that come with necessary accessories such as mounting hardware, display units, and wiring harnesses, simplifying the installation process.
Installation Made Easy: Step-by-Step Guide for Beginners
Preparing Your Bike for Conversion
Start by gathering all the tools required for installation, such as wrenches, screwdrivers, and any specific tools mentioned in the conversion kit manual. Ensure that your bike is in good condition overall, paying attention to brakes and tires. A smooth ride can be ensured by tuning your bicycle before adding the electric components.
Installing the Motor and Battery
Follow the manual closely to install the motor securely into either the wheel hub or frame, depending on your kit type. If it’s a hub motor, you’ll remove the existing wheel and replace it with the motorized one. Once the motor is in place, position the battery on the bike frame or designated rack, securing it firmly to avoid any movement during your rides.
Wiring and Testing the System
Connect the wires according to the provided diagram. It’s crucial to ensure that all connections are tight and well-insulated to prevent any electrical issues. After completing the wiring, conduct a test by powering up the system. Check if the display lights up and if the motor responds when you begin to pedal. This testing phase is essential to confirm everything is working correctly.
Choosing the Right Kit for Your Cycling Needs: Types and Options Explained
Recreational vs. Commuting Kits
Assess your cycling habits when choosing the right kit. If you’re a recreational cyclist, you might opt for a kit that enhances leisure rides with moderate power and battery capacity. On the other hand, if you plan to commute, you may require a powerful motor and a battery that supports longer distances since daily commutes can be challenging without the right support.
All-Terrain vs. Road Kits
Consider the type of terrain you will frequently ride on. All-terrain kits are designed to tackle rough trails with durable motors and sturdy components. These kits often include greater torque capabilities. Alternatively, for road cycling, a lightweight setup may be preferable, focusing instead on efficiency and speed.
Maximising Your E-Bike Experience: Maintenance Tips and Best Practices
Regular Inspection and Care
To ensure your converted E-bike remains in top condition, carry out regular checks on the motor, battery, and overall bicycle. Keep the chain lubricated and brakes adjusted for safe rides. It’s also advisable to inspect the electrical connections periodically to prevent any issues during your journeys.
Charging Practices
Batteries benefit from proper charging practices. Avoid letting your battery fully deplete regularly; instead, charge it when it’s around 20% to 30% capacity left. Also, store the battery in a cool, dry place when not in use to extend its lifespan.
Upgrading Components
As experience grows with your E-bike, consider upgrading components such as the battery for increased range or a better display for enhanced features. These upgrades can significantly improve your riding experience and keep your bike feeling fresh and efficient.