


Understanding Shellac: What is a Shellac Starter Kit?
Defining Shellac
Shellac is a type of nail coating that combines both gel and traditional polish. It offers a high-shine finish and is known for its long-lasting properties, often remaining chip-free for up to two weeks or more. A Shellac starter kit typically contains everything you need to apply this innovative nail product at home, making it a popular choice for both professionals and DIY enthusiasts.
What’s Included in a Starter Kit?
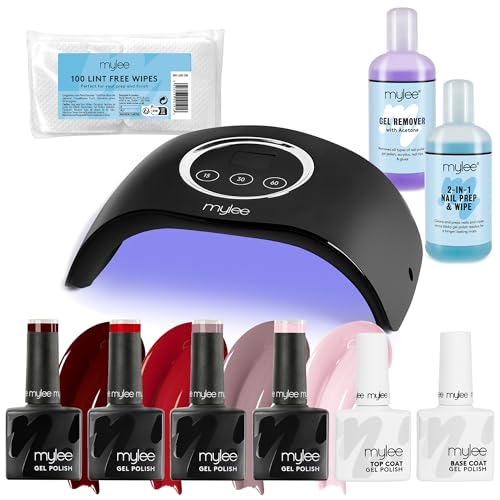
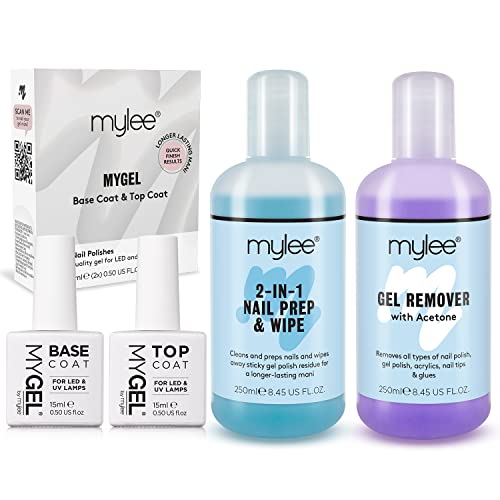
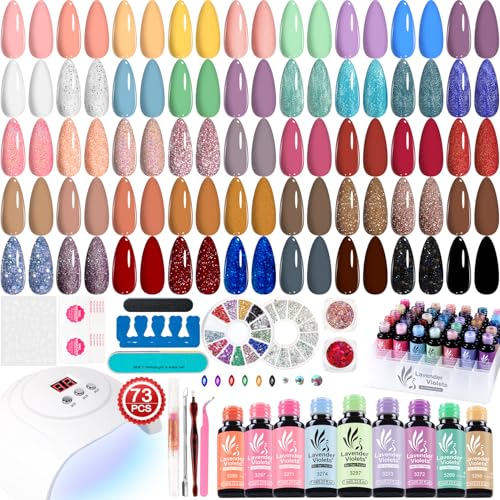
A Shellac starter kit generally includes the essential tools and products required for application and curing. This often features Shellac nail polish in various shades, a UV or LED lamp for curing the polish, a base coat, a top coat, and tools for preparing your nails. The inclusion of these elements helps ensure you have a complete setup for achieving salon-quality nails right at home.
Key Components of a Shellac Starter Kit: Tools and Products You Need
Essential Tools in Every Kit
Among the must-have tools in a Shellac starter kit, you will usually find a UV or LED lamp, which is critical for curing the polish. Without this lamp, the polish would not set properly, leading to smudging or chipping. Additionally, nail files, buffers, and cuticle pushers are essential for preparing your natural nails before application.
Products You Can’t Do Without
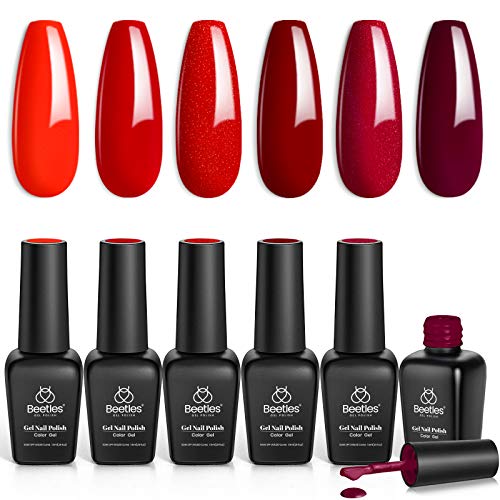
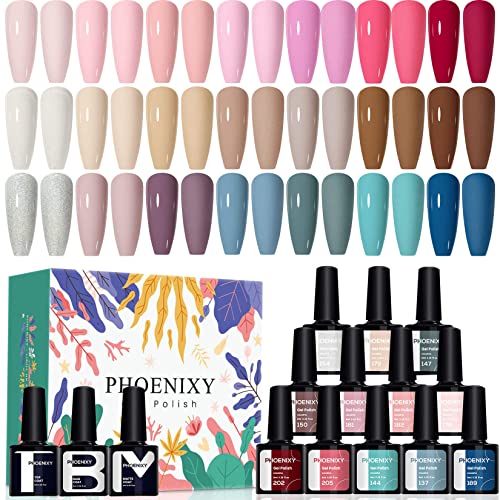
The kit will also include Shellac base coat and top coat, as these are vital for ensuring your polish lasts. The base coat adheres the polish to your nails, while the top coat provides a protective layer that enhances shine and durability. Often, the kits will feature a selection of Shellac colours, allowing for artistic expression in your nail designs.
How to Use a Shellac Starter Kit: Step-by-Step Guide for Beginners
Preparing Your Nails
Begin by ensuring your nails are clean and dry. Use a nail file to shape them, and gently push back your cuticles with a cuticle pusher. Buffing your nails lightly can also help the Shellac adhere better.
Applying Shellac
Next, apply a thin layer of the Shellac base coat. Make sure to seal the edges of your nails by running the brush along the tip. Cure this layer under the UV or LED lamp for the time specified in the kit instructions, usually about 30 seconds to 2 minutes depending on the lamp.
Layering Colour and Top Coat
After curing the base coat, you can now apply your chosen Shellac colour. Apply two thin layers of the colour, curing each layer as directed. Finally, finish with a top coat for sealing and shine, followed by another curing process.
Final Touches and Cleansing
Once cured, wipe your nails with a lint-free cloth and a Shellac cleanser, if included, to remove any sticky residue. Your Shellac nails are now ready to showcase!
Choosing the Right Shellac Starter Kit: Factors to Consider Before Buying
Assess Your Needs
Before purchasing a kit, consider the frequency of use. If you plan to use Shellac regularly, invest in a more comprehensive kit with a variety of colours and possibly a higher-quality lamp. For occasional use, a basic kit should suffice.
Check Product Quality
Look for kits that include well-reviewed products. Quality counts when it comes to both the polish and the curing lamp. A reliable lamp will not only cure efficiently but also last longer, saving you money in the long run.
Consider Size and Portability
If you’re short on space or intend to travel with your kit, look for a compact option that makes storage easy. Some kits come in convenient packages that fit neatly in a drawer or a bag.
Expert Tips for Perfect Shellac Nails at Home
Practice Makes Perfect
Like most skills, applying Shellac nails gets easier with practice. Don’t be discouraged if your first attempt doesn’t look salon-perfect. Stick with it and you will improve.
Maintain Proper Lamp Protocols
Always follow the manufacturer’s instructions for your specific lamp to ensure proper curing. Over-curing or under-curing can affect the longevity and appearance of your nails.
Care for Your Nails
Post-application, make sure to keep your nails hydrated. Using a good cuticle oil will promote healthy nail growth and keep your Shellac looking fresh for longer.