What is Tubeless Sealant and How Does It Work?
Understanding Tubeless Sealant
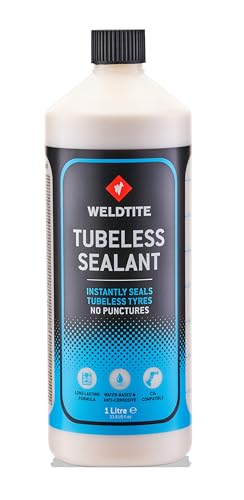
Tubeless sealant is a liquid product designed to repair punctures in tubeless tyres while allowing for a tubeless setup. Think of it as a kind of magical liquid that finds its way into your tyre and acts as a self-sealing agent. When a small puncture occurs, the sealant quickly fills the hole and solidifies, preventing air from escaping. This means you can continue riding without needing to stop and fix a flat tyre.
The Science Behind Tubeless Sealant
The way tubeless sealant works involves a blend of fibres, particles, and latex. When a puncture happens, the liquid immediately flows to the site of the damage. The particles within the sealant swarm around the puncture and form a plug, which is then reinforced by the latex that dries to create a lasting seal. This process not only repairs the tyre but also can help prevent future issues.
The Benefits of Using Tubeless Sealant for Your Tyres
Enhanced Reliability on the Road
Using tubeless sealant provides a significant advantage in terms of reliability. Imagine riding your bike on unpredictable terrain, and feeling that anxiety of a flat tyre. With tubeless sealant, you’re not just at mercy of the terrain; the sealant actively works to keep your tyres inflated. This means spending less time repairing flats and more time enjoying your ride.
Improved Ride Quality
Another benefit of tubeless sealant is the improved ride quality. With tubeless tyres, you can run lower pressures without the risk of pinch flats. Lower pressure provides better traction and comfort, allowing for a smoother ride. The sealant helps maintain pressure, enabling you to experience this enhanced performance.
Lower Weight and Fewer Components
Tubeless setups are generally lighter because you’re not using inner tubes. With tubeless sealant, you can further reduce weight, creating a more efficient ride. The elimination of tubes also reduces the potential for puncture-related failures, keeping your bike in optimal condition.
Choosing the Right Tubeless Sealant for Your Needs
Consider Your Riding Style
To choose the right tubeless sealant, we first need to consider how and where we ride. If we frequently traverse rough trails with potential for larger punctures, we might opt for a sealant with more robust sealing capabilities and larger particles. For road cycling, a thinner sealant might be sufficient, focusing on quick sealing for small punctures.
Evaluate the Environmental Concerns
Next, we should think about environmental considerations. Some tubeless sealants are eco-friendly while others may contain chemicals that are less kind to the environment. If sustainability matters to us, we might want to look for sealants that advertise non-toxic ingredients. Also, consider the lifespan of the sealant, as some products last longer than others, contributing to fewer waste cycles.
Compatibility with Tyres
It is essential to ensure that the tubeless sealant we choose is compatible with our specific tyre type. While most sealants work with a wide range of tubeless systems, checking compatibility will help us avoid issues down the line. We should also be aware of the manufacturer’s recommendations for the amount of sealant to use in each tyre size.
How to Properly Apply Tubeless Sealant: A Step-by-Step Guide
Gather Required Materials
Before applying tubeless sealant, we should gather our materials: tubeless tyres, a tubeless valve, and of course, the sealant itself. Having all the necessary items on hand will ensure a smoother application process without unnecessary interruptions.
Prepare the Tyre and Rim
Make sure our tyre is clean and the rim is prepared properly. This includes checking for any remnants of the old sealant or debris that might interfere with the seal. A clean rim and tyre will provide the best chance for the sealant to adhere and work effectively.
Adding Sealant to the Tyre
We then need to add the recommended amount of sealant into the tyre. If the sealant comes in a bottle with an applicator, simply use that for precise measurement. If not, we can use a measuring cup or syringe to avoid any mess, ensuring that the right amount gets into the tyre.
Seating the Tyre on the Rim
After adding the sealant, we should fit the tyre back onto the rim, making sure it seats evenly. This might require some spinning of the tyre or shaking to ensure the sealant is evenly distributed around the inside of the tyre. Once positioned, we can inflate the tyre to the correct pressure as recommended.
Frequently Asked Questions about Tubeless Sealant
How Often Should I Replace Tubeless Sealant?
It’s generally recommended to check and replace tubeless sealant every few months, depending on riding conditions. Sealant can dry out or lose effectiveness over time, so maintaining fresh sealant helps ensure continued protection against punctures.
Can I Use Different Brands of Sealant Together?
While it’s technically possible to combine different brands of tubeless sealant, it’s best to stick with one type for optimal performance. Mixing different formulations can lead to unpredictable results, so to maintain the effectiveness of your sealant, choose one that suits all your needs.
Does tubeless sealant work in all types of tyres?
Not every tyre is suitable for tubeless sealant, particularly some road tyres and certain types of mountain bike tyres. Always verify if our specific tyre setup is compatible with tubeless sealants before application to prevent any potential issues.


